How to Paint - Aftermath Meeklings
- Chris Bowler
- Feb 12, 2021
- 3 min read
Here's a quick tutorial on how I painted the Meeklings for Plaid Hat Games' Aftermath. See here for more tutorials for Aftermath.
Recipe
Citadel Contrast Black Templar
Citadel Contrast Gore Grunta Fur
Citadel Contrast Magos Purple
Formula P3 Morrow White
Formula P3 Ironhull Grey
Formula P3 Midlund Flesh
Formula P3 Ryn Flesh
Formula P3 Bogrin Brown
Formula P3 Meaty Ochre
Formula P3 Moldy Ochre
Formula P3 Menoth White Highlight
Formula P3 Underbelly Blue
Formula P3 Beaten Purple
Formula P3 Gravedigger Denim
Formula P3 Coal Black
Formula P3 Battlefield Brown
Citadel Runefang Steel
Green Stuff World Mojave Mudcrack
Method
To begin with I work up a base colour. The trick I have found when painting models like the Meeklings, which are primarily one colour, is to work with a large brush to create a base colour with blended highlights across the whole miniature at once. As you can see below I began with a coat of Ironhull grey and then added Morrow White to the mix, adding a little more with each successive pass. Each pass of the brush I'm aiming to hit slightly less of the model each time to build up the highlights in the higher areas and leave the darker grey in the recesses.
As I get to the last stage of highlight I switch to a smaller drybrush and really focus in one areas like the face and belly. Finally I finish this step by adding highlights with a fine detail brush to individual hairs, such as around the chin, cheeks and nose and above the feet.


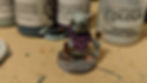
With the main body of the model done it was time to work on the details. Here I've blocked out the colours. I used Magos Purple Contrast for the poncho, Midlund Flesh for the ears and feet and Black Templar Contrast for the goggles.

Using Ryn Flesh I added highlights to the toes, tail and ears.

Then the belt and fletching on the quarrels was picked out with Gore Grunta Contrast. The crossbow was washed with Black Templar Contrast.

Highlights were then added to the belt, pouch and fletching using Bogrin Brown.

Next I added a little non-metallic metal effect to the goggles, although metallic gold could be used instead.
With a base of Bogrin Brown I then added a layer of Meaty Ochre, this covers around 90% of the base colour. Then using Moldy Ochre I add highlights to around 50%. Finally using Menoth White Highlight I add light reflections, these are used to define edges or corners and are roundly 10% of the base size. I used the same effect on the clip at the back of the goggles.


With that done I added a dark base coat to the quarrels in Coal Black and painted the bow with Underbelly Blue.

Next up I worked on the poncho. I began with a layer of Beaten Purple then added some white to it and painted in the mid tones. Here I'm covering most of the folds, attempting to leave nice dark shadows in the recesses. Then I finish off by adding some more white and hitting the edges with a highlight. Here I'm wanting to define the shape of the poncho so I'm looking for edges and corners.


To finish off I added the nails in black, added some metallic silver to the quarrels and some edge highlights to the bow and the goggles in Gravedigger Denim.
The base was finished with Battlefield Brown and a layer of Mojave Mudcrack for a post-apocalyptic look.


The other Meeklings all followed roughly the same method but using different colours to create different looks.

For more painting tutorials for Aftermath check out this link. If you like these articles and want to see more please let me know down in the comments. Until next time, have fun painting.
The Duke


